Difference between revisions of "Linux Full Node"
(→Compile and Install the Mochimo Software) |
|||
| (4 intermediate revisions by the same user not shown) | |||
| Line 46: | Line 46: | ||
===Install CUDA 9.2 and Nvidia Drivers=== | ===Install CUDA 9.2 and Nvidia Drivers=== | ||
| + | |||
| + | ''You can skip this section if you dont intent to mine with your node'' | ||
| + | |||
During the installation of CUDA, a compatible Nvidia Driver will also be installed. If you wish to use a different Nvidia driver, you must install it AFTER the CUDA installation. | During the installation of CUDA, a compatible Nvidia Driver will also be installed. If you wish to use a different Nvidia driver, you must install it AFTER the CUDA installation. | ||
<br>Download the Base Installer: [https://developer.nvidia.com/cuda-92-download-archive?target_os=Linux&target_arch=x86_64&target_distro=Ubuntu&target_version=1604&target_type=deblocal Cuda 9.2 for Ubuntu 16.04] | <br>Download the Base Installer: [https://developer.nvidia.com/cuda-92-download-archive?target_os=Linux&target_arch=x86_64&target_distro=Ubuntu&target_version=1604&target_type=deblocal Cuda 9.2 for Ubuntu 16.04] | ||
| Line 59: | Line 62: | ||
* or Chillax with a realtime visualisation of the Mochimo Network on [https://www.mochimap.net/ MochiMap.net] | * or Chillax with a realtime visualisation of the Mochimo Network on [https://www.mochimap.net/ MochiMap.net] | ||
<br> | <br> | ||
| − | |||
==Section II: Mochimo Software Installation== | ==Section II: Mochimo Software Installation== | ||
| Line 76: | Line 78: | ||
There are 3 simple steps: | There are 3 simple steps: | ||
#Navigate to the src directory: <code>cd mochimo/src</code> | #Navigate to the src directory: <code>cd mochimo/src</code> | ||
| − | #Compile the software: <code>./makeunx bin -DCUDA</code> | + | #Compile the software: <code>./makeunx bin -DCUDA</code>. For a non-mining node, use <code>./makeunx bin -DCPU</code> |
#Install the software: <code>./makeunx install</code><br/> | #Install the software: <code>./makeunx install</code><br/> | ||
[[File:MochimoCompilation.png|500px|none|left|Mochimo Compilation No Errors]] | [[File:MochimoCompilation.png|500px|none|left|Mochimo Compilation No Errors]] | ||
| Line 86: | Line 88: | ||
This section will guide you through running your newly compiled Mochimo software. | This section will guide you through running your newly compiled Mochimo software. | ||
<br> | <br> | ||
| − | + | ===Create a wallet=== | |
| − | ===Create a | + | You can follow the [[Mojo Quick Start Guide|quick start]] or [[Mojo Wallet|advanced]] guide to create a wallet. |
| − | |||
| − | |||
| − | |||
| − | |||
| − | |||
| − | |||
| − | |||
| − | |||
| − | |||
| − | |||
| − | |||
| − | |||
| − | |||
| − | |||
| − | |||
| − | |||
| − | [[ | ||
| − | |||
| − | |||
| − | |||
| − | |||
| − | |||
| − | |||
| − | |||
| − | |||
| − | |||
| − | |||
| − | |||
| − | |||
| − | |||
| − | |||
| − | [[ | ||
| − | |||
| − | |||
| − | |||
| − | |||
| − | |||
| − | |||
| − | |||
| − | |||
| − | |||
| − | |||
| − | |||
| − | |||
| − | |||
| − | |||
| − | |||
| − | |||
===Exporting your mining address=== | ===Exporting your mining address=== | ||
| − | + | Create an address [[Mojo_Wallet#Activate_an_address|without tag]] and export it as ''Legacy''. | |
| − | + | Rename the file to ''maddr.dat'' | |
| − | |||
| − | |||
| − | |||
| − | |||
| − | |||
| − | |||
| − | |||
| − | |||
| − | |||
===Running the Miner=== | ===Running the Miner=== | ||
| − | Go to the ./bin directory | + | Go to the <code>./bin directory</code> |
<br>Type: <code>./gomochi d</code><br/> | <br>Type: <code>./gomochi d</code><br/> | ||
The miner is running now, but it may take up to a few minutes to sync. | The miner is running now, but it may take up to a few minutes to sync. | ||
Latest revision as of 04:00, 9 August 2019
This guide was originally built by, and for, the Mochimo Discord Community. It has since been updated for compatibility with code version 2.2 and will cover the basics for installing and running the Mochimo GPU Miner/Node on Ubuntu 16.04 with Nvidia Graphics Cards.
Contents
Section I: GPU Mining Rig Setup
This section will guide you through preparing your system installation and settings to allow you to mine on the Mochimo network with an Nvidia GPU.
ISO Setup
With the exception of the CLI wallet, the Full Node software is not compatible with any version of Windows.
These tools are used to create a bootable drive to install Ubuntu. Skip if you already are running an OS.
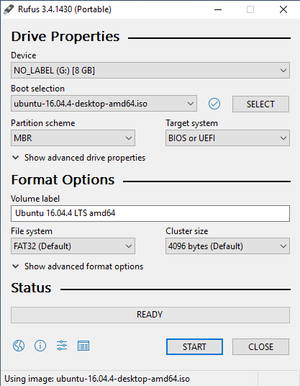
- Download: Rufus Install.
- Download: Ubuntu 16.04 ISO
- Use Rufus to make a USB bootable with this ISO.
- When Installing: Do a full wipe and fresh install.
Static IP
Depending on your router you may not need to set a Static IP address, however it is encouraged to do so to save yourself the pain of future issues.
Firstly, open a Terminal and type ip route
Your output may differ, but generally your Gateway can be found next to "default via", and your IP address can be found next to "src".
Alternatively, you can type ifconfig in a terminal to find your IP address.
To set your IP address as static:
- Click the Network icon in the top right corner and select "Edit Connections".
- Choose your network connection and click the "Edit" button.
- Navigate to the "IPv4 Settings" tab.
- Change the "Method" to "Manual".
- Next to the "Addresses" table, click the "Add" button and enter your IP Address, Netmask (usually 255.255.255.0) and Gateway.
- Click save and close the Network Connections window.
Port Forwarding
For a Mochimo node to operate correctly, you must have port 2095 (TCP protocol) forwarded to your Rig's local IP.
If you need help, visit the following site, find your router, and follow its instructions:
portforwarding.com
Install build-essential Package
The build-essential package contains software that must be installed to compile a Mochimo node. On rare occasions, this may not already be installed.
To Install:
sudo apt-get install build-essential
Install CUDA 9.2 and Nvidia Drivers
You can skip this section if you dont intent to mine with your node
During the installation of CUDA, a compatible Nvidia Driver will also be installed. If you wish to use a different Nvidia driver, you must install it AFTER the CUDA installation.
Download the Base Installer: Cuda 9.2 for Ubuntu 16.04
To Install:
    sudo dpkg -i cuda-repo-ubuntu1604-9-2-local_9.2.148-1_amd64.deb
    sudo apt-key add /var/cuda-repo-9-2*/7fa2af80.pub
    sudo apt-get update
    sudo apt-get install cuda
Depending on your internet connection, this installation can take some time.
So, while you're waiting, take the time to:
- Learn how to use the GUI Wallet Mojo
- Come say hi on Discord
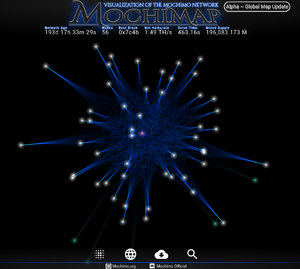
- or Chillax with a realtime visualisation of the Mochimo Network on MochiMap.net
Section II: Mochimo Software Installation
This section will guide you through downloading, compiling and installing the latest Mochimo software.
Download the Latest Mochimo Software
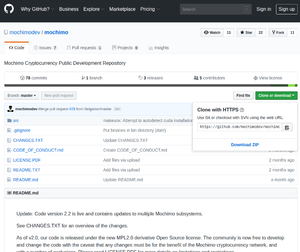
The Mochimo software is available on a public Github repository for everyone to see and contribute to: Mochimo Github
To Download:
Compile and Install the Mochimo Software
Before you can run the miner/node, you must compile the software into binary executable files.
There are 3 simple steps:
- Navigate to the src directory:
cd mochimo/src - Compile the software:
./makeunx bin -DCUDA. For a non-mining node, use./makeunx bin -DCPU - Install the software:
./makeunx install
- If you encounter errors during compilation, there may be a problem with your system setup and your Mochimo node may not operate correctly.
There is almost always someone on the Mochimo Discord to help you identify the issue if you are having trouble.
Section III: Run the Mochimo Node/Miner
This section will guide you through running your newly compiled Mochimo software.
Create a wallet
You can follow the quick start or advanced guide to create a wallet.
Exporting your mining address
Create an address without tag and export it as Legacy. Rename the file to maddr.dat
Running the Miner
Go to the ./bin directory
Type: ./gomochi d
The miner is running now, but it may take up to a few minutes to sync.
Type: CTRL+C to bring up command prompt
- ? for options
- q for exit
- r for restart
How do I know my node is working?
There are a few obvious indications as to whether your node is working or not.
- If your node is updating blocks and receiving transactions from the network,
TX recvd, then your node is working. - If you are achieving 100% GPU Utilisation when you type
nvidia-smiinto a Terminal, then your node is mining.
- Don't worry if it's not mining straight away, sometimes it can take until the next block to receive transactions to mine with.
- If you can find your node on MochiMap.net, it's also a good sign that it's operating correctly.
- Additionally, if you click your node on MochiMap, it will give you the apparent health status of your node.
Section IV: Updating the Mochimo Software
Assumptions:
- Your Mochimo mining installation is found in your home directory at `~/mochimo/bin`
- You are GPU mining
- Stop your miner:
- Ctrl-C <Enter> q <Enter>
- Backup your old installation:
- cd ~
- mv mochimo/ mochimo-bak/
- Download new source files:
- git clone https://github.com/mochimodev/mochimo
- Compile new source:
- cd mochimo/src/
- ./makeunx bin -DCUDA
- ./makeunx install
- cd ../bin
- Move your old mining address over to the new installation:
- cp ~/mochimo-bak/bin/maddr.dat ~/mochimo/bin/
- Run the new miner:
- ./gomochi d
Troubleshooting & FAQ
For frequently encountered issues and troubleshooting, see our Mining FAQ Page.


